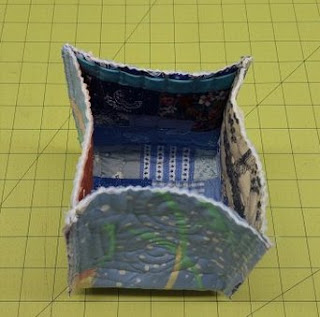
 I got a couple of emails asking me to expand on the idea I wrote about in the "Scraps into Buckets" post on Friday. So I thought about writing a tutorial. Be warned this tutorial is picture heavy and rather long. But I think I've included every detail. If you're a seasoned sewist, you may want to read through and then go do your own thing.
 I still have baskets to make, but the problem is that I've already pieced and quilted the scraps. So we'll begin this tutorial with the idea that you've made a quilt sandwich of at least 16 inches square. I should mention that all of my basket fabrics were densely quilted using many motifs as this is a great way to practice your quilting.
At the cutting table. Cut your quilted fabric to 15 X 15 (photo 1). I used a Frixion pen to draw lines in each corner indicating where I will cut (photo 2). The yellow ovals indicate where quilting pins are to stabilize the pieces since I cut two baskets at a time using my large titanium scissors. (Rotary cutters are difficult to control in corners.) The lines in step two above are 4½ " long for a medium size basket. (Please ignore what I see now looks like appears to be a bad cut on the bottom, that's a photo manipulation error.) Photo 3 shows you what the piece looks like after cutting.
On to the machine. Fold the cut piece on the diagonal so that you can match the two edges of one corner (photo A). When sewing these baskets, I make a straight seam ¼" from the edge, then add a zigzag seam on the inside (see my crazy drawing in photo B). This is to strengthen the seam in case the basket is used to hold heavy, bulky items. Once both sides of the basket are stitched, you can refold the basket to sew the other two sides. This is a little difficult because the basket does not want to fold flat (photo C); use a couple of pins and avoid pushing the center of the basket since that may warp the seam. Again sew a straight line and a zigzag line against the edge.
Binding. You should now have a box shape (well, sort of anyway) and are ready to finish off the top. I have tried a couple of ways to do this, and believe me, I have some messy baskets to prove it. I've finally settled on one technique that works well for me.
Cut a strip of binding 1½" X 16". Turn the basket so that the seams are on the inside and pin the binding around the top edge (photo A). TIP: Now is a good time to add your label. Double check your binding to connect the ends: there should be a 1½" overlap. Anything over needs to be cut off. Fold and pin as in photo C. Cut the excess and finger-press the seam open (photo D). You can now sew the binding completely around the basket. TIP: Take your time, stop often and readjust. Otherwise, the basket will catch on everything in its path and derail your stitching.
Squaring up. I spent a great deal of time trying to get my basket into square shapes. It was one of those things that I had to prove to myself. So I pressed. Then I sprayed water and pressed. I used steam. I tried sizing. Finally, I had an idea!
My secret: weight. (No, not mine but I considered...) I digress.
First you have to press with the iron to set the lines. Use the seams to figure out where the fold lines are at the bottom of the basket. Fold and press from the bottom end of one seam across to the seam on it's side (corner to corner). Do all four bottom lines; then do the side seams.
 Now you can fold the basket into a box shape. Think of a paper bag fold. First push the sides inward (photo A); as the sides fold, the bag will collapse in on itself (photo B). That's a good thing, so hold it if possible. Check that the edges are straight and pin (photo C). Then put something with weight on top of the basket (photo D).
 I leave the weight on the bags for a day or so. I also stack several bags on top or beside each other and use the same weight. Of course, heavy books will work, but I've been using a plastic container of fabric (really anything heavy but clean) and I'm quite satisfied with the result.
This nesting stack shows the difference between the two that have been weighted (as opposed to pressing with an iron) and the top one which has not been weighted.
Nest your baskets. I used an easy formula to create my nesting baskets. I cut all of my quilted fabric the same 15" square. The corners are where I made the changes. I started with the 4½" and then cut the next one 4" and the last one 5½". The changes are very subtle but it's just enough to do the job.
Thanks for visiting and making it to the end! I hope you enjoyed the tutorial and that it answers all of your questions. If not, please let me know in the comments. Do you plan to make a few quilted baskets or have you? I'd love to know how they turned out!
Linking Up with the Party Queens


3 comments:
Oh, Mary, I love these--beautiful and useful, too! Thanks for sharing your tips!
Thanks Jenclair! They do seem to be popular. I can't wait to give to the friends they are meant for.
That has to be the simplest, easiest basket tutorial I have seen. You rock, Mary!!!
Hugs,
Preeti.
Post a Comment